From First Push-Up to First Handstand: The Real Progression
Build a realistic push-up to handstand progression with scalable strength work, coached wall practice, readiness checks, and a simple beginner practice plan.
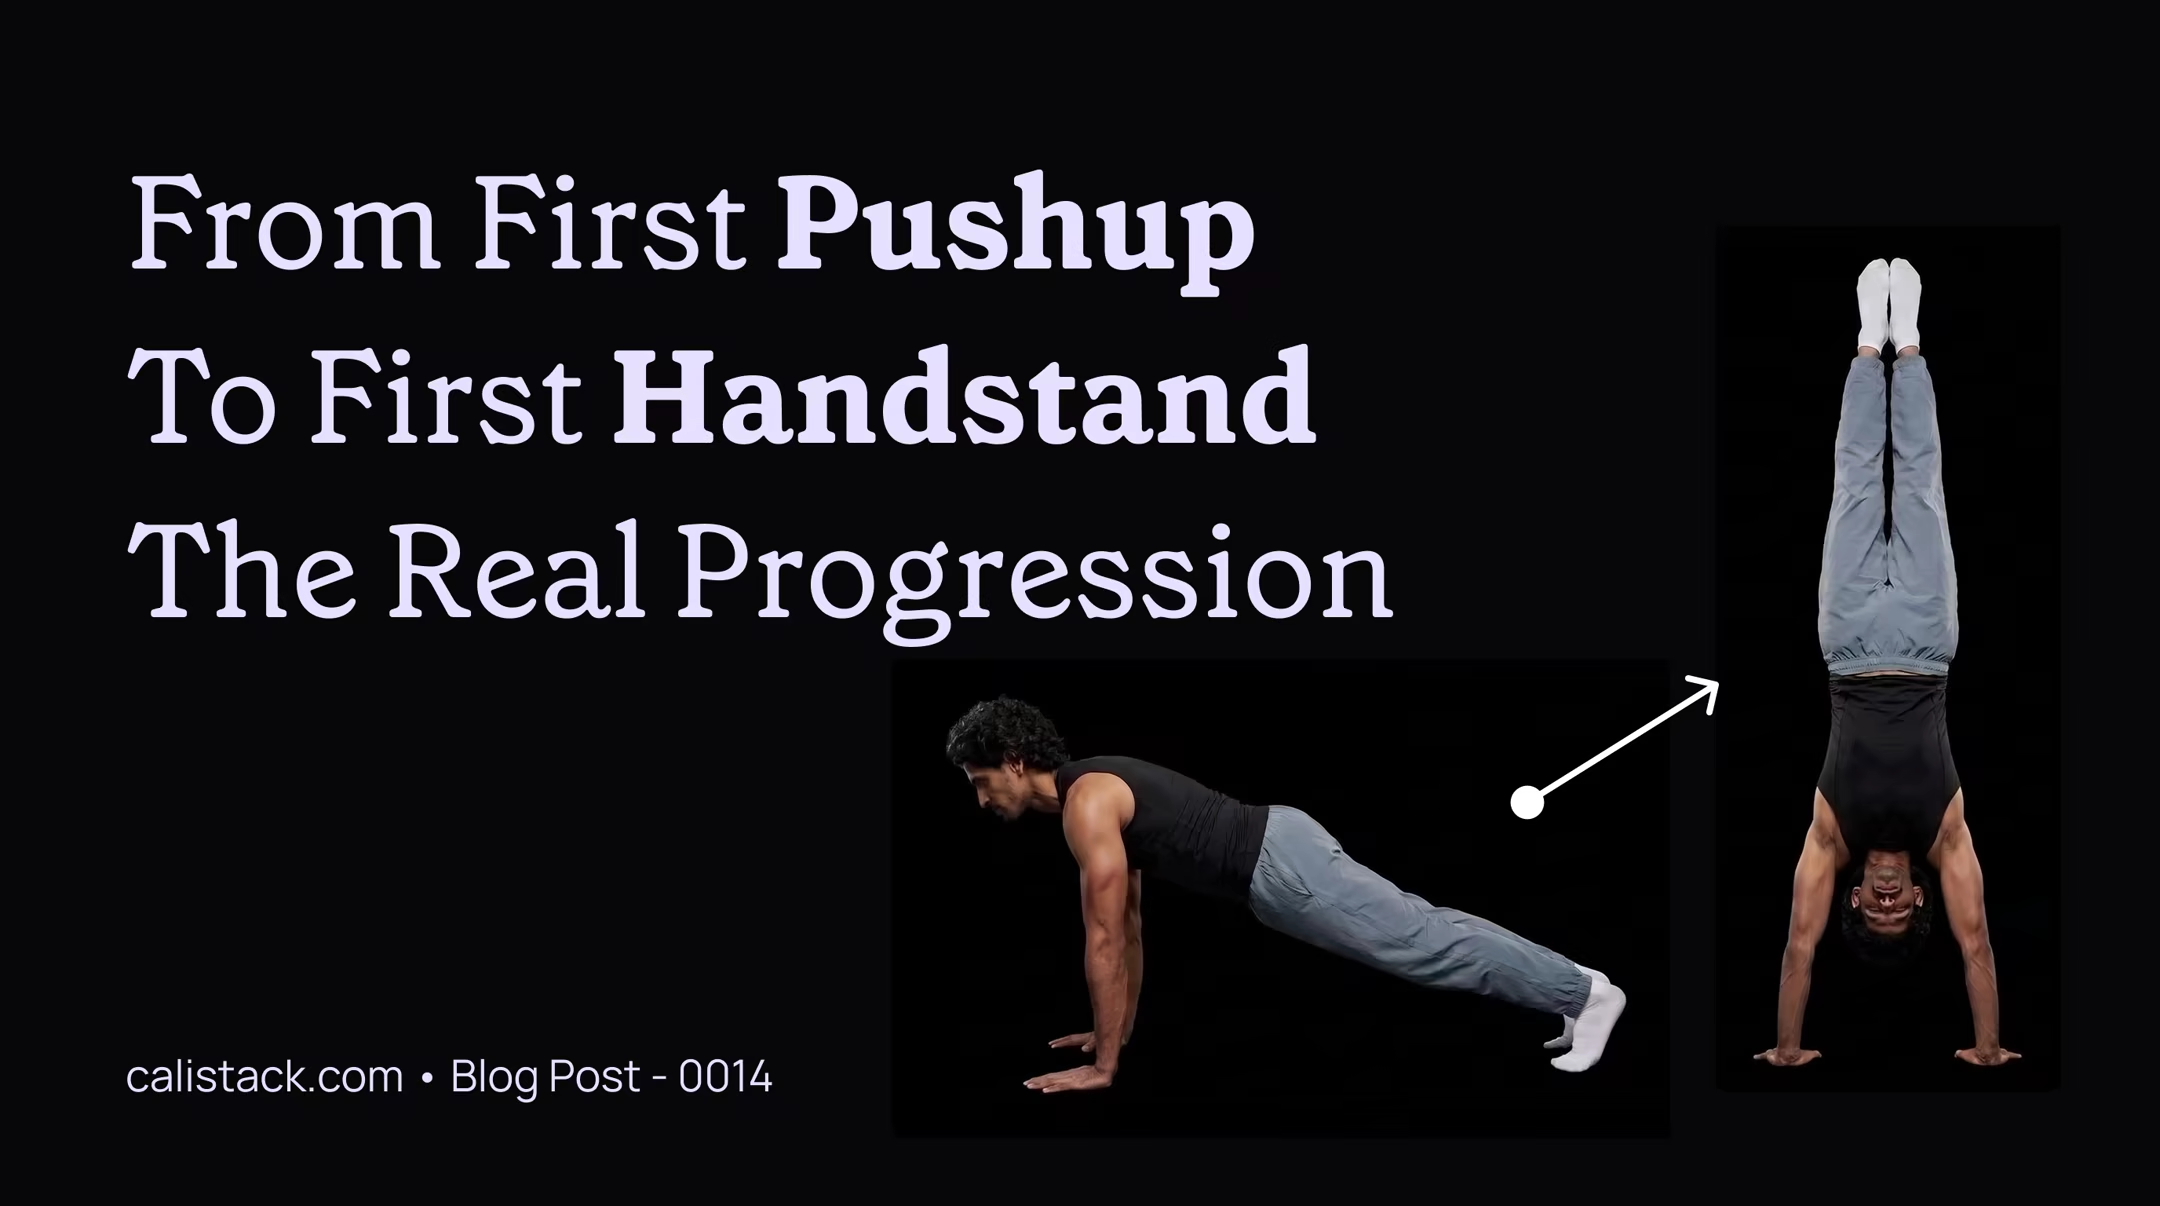
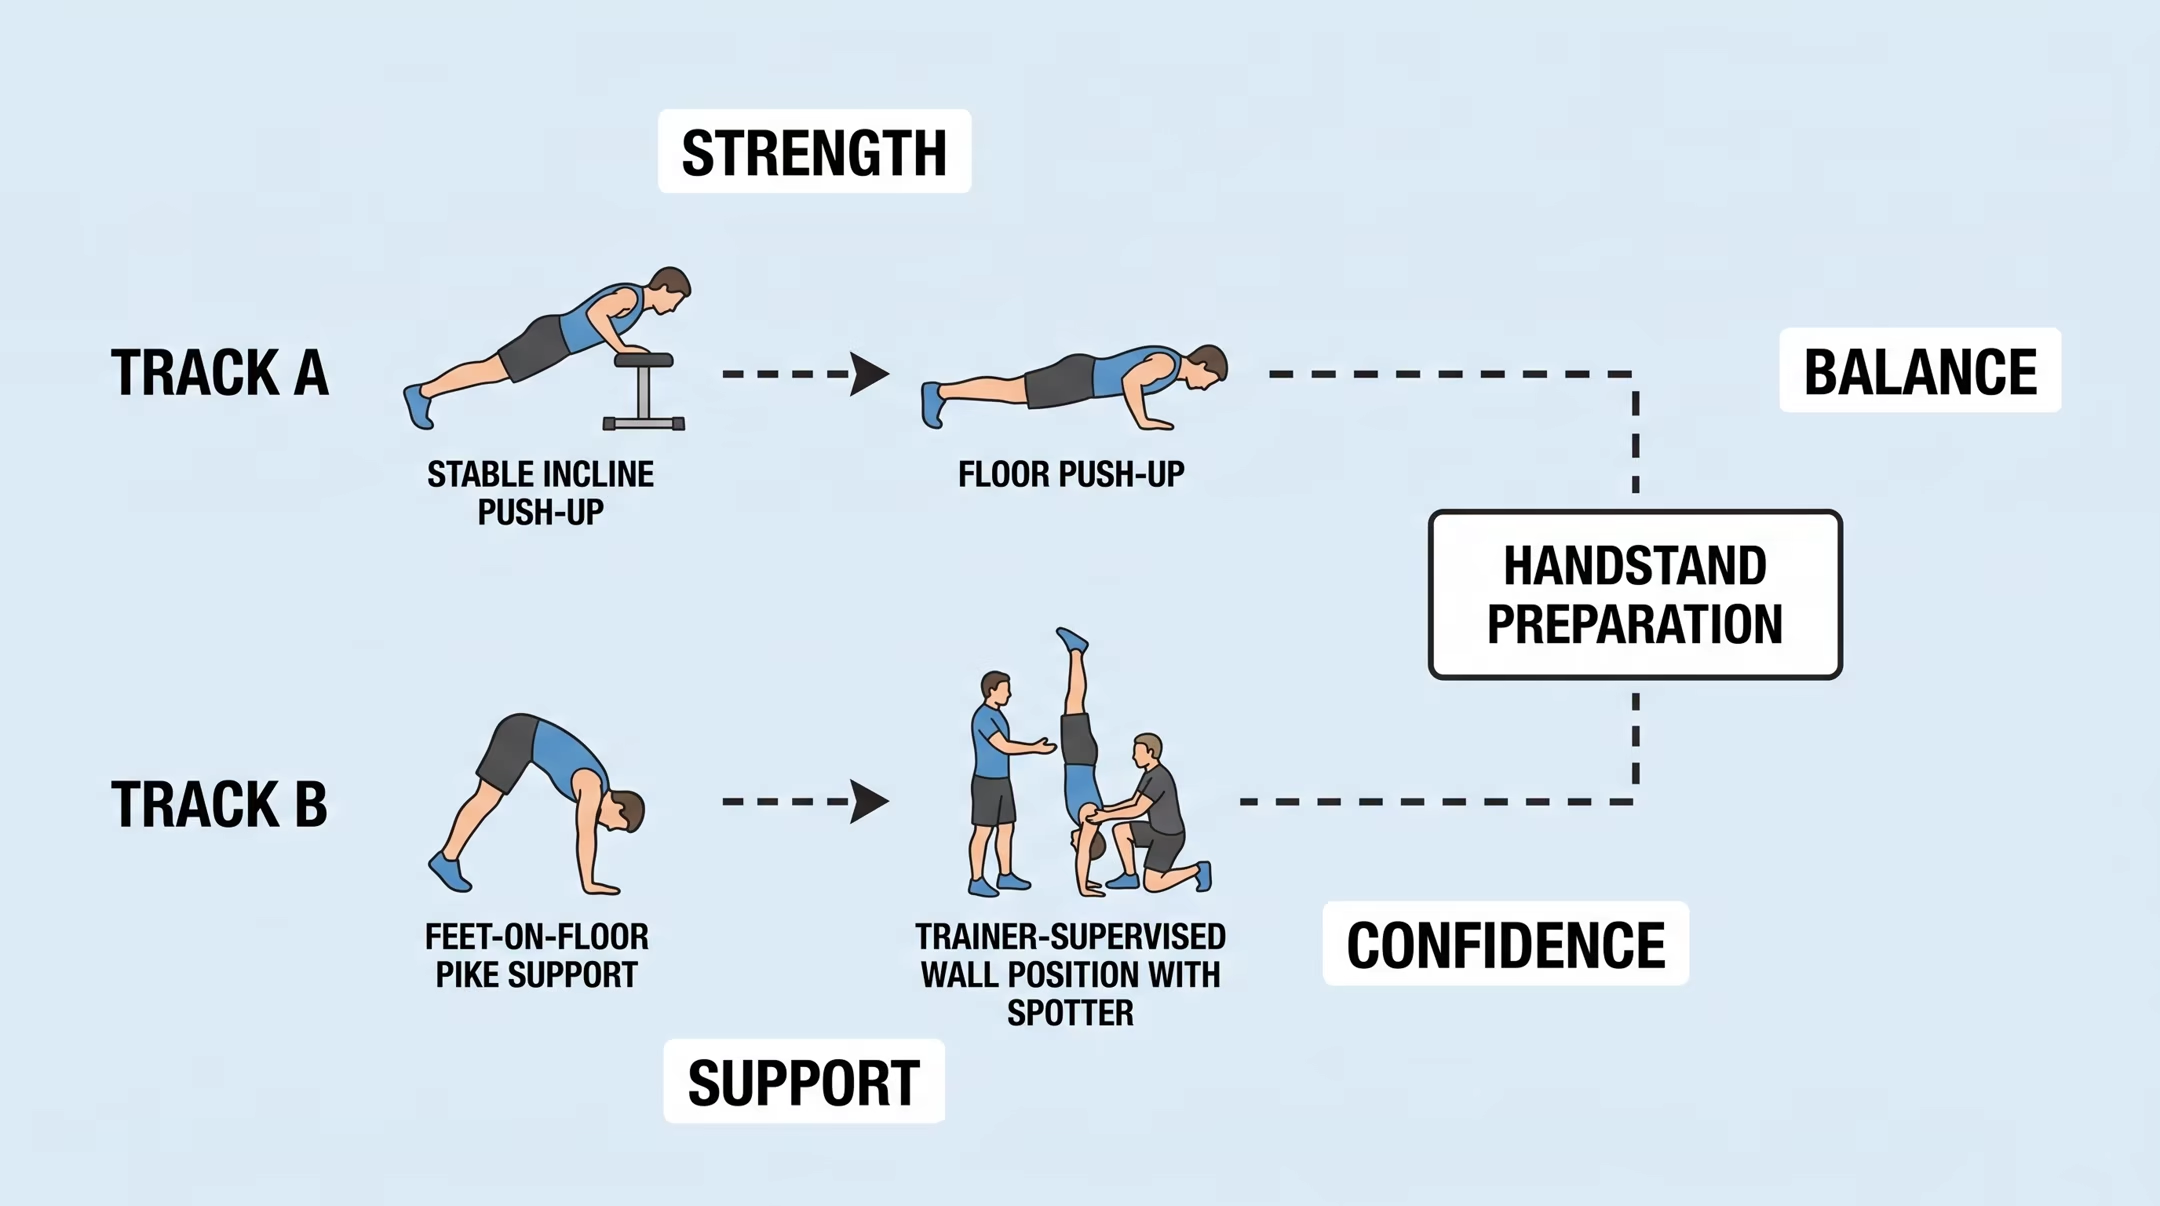
Your first push-up and your first handstand can belong to the same training plan, but one does not automatically lead to the other. A push-up develops horizontal pushing strength. A handstand asks you to support yourself overhead, handle being upside down, exit under control, and manage balance through your hands. A useful push-up to handstand progression develops those abilities alongside each other. You can improve an incline push-up while learning an appropriate support drill. You do not need to finish every pushing exercise before starting handstand preparation.
Train two paths toward one goal
Think of strength work and skill practice as related tasks with different measures. For push-ups, watch your body position, range of movement, and control. For handstand preparation, watch whether you can support the chosen position comfortably, breathe, and return to the floor intentionally. More push-ups can be useful without solving a nervous entry or an unfamiliar overhead position. Likewise, a brief supported handstand does not mean your general strength training is complete. CaliStack's progression-centered approach is a useful organizing idea here: choose a manageable starting point and understand what the next exercise is meant to develop.
“Your next progression is the version you can control, including the way back down.”
Choose a push-up you can repeat well
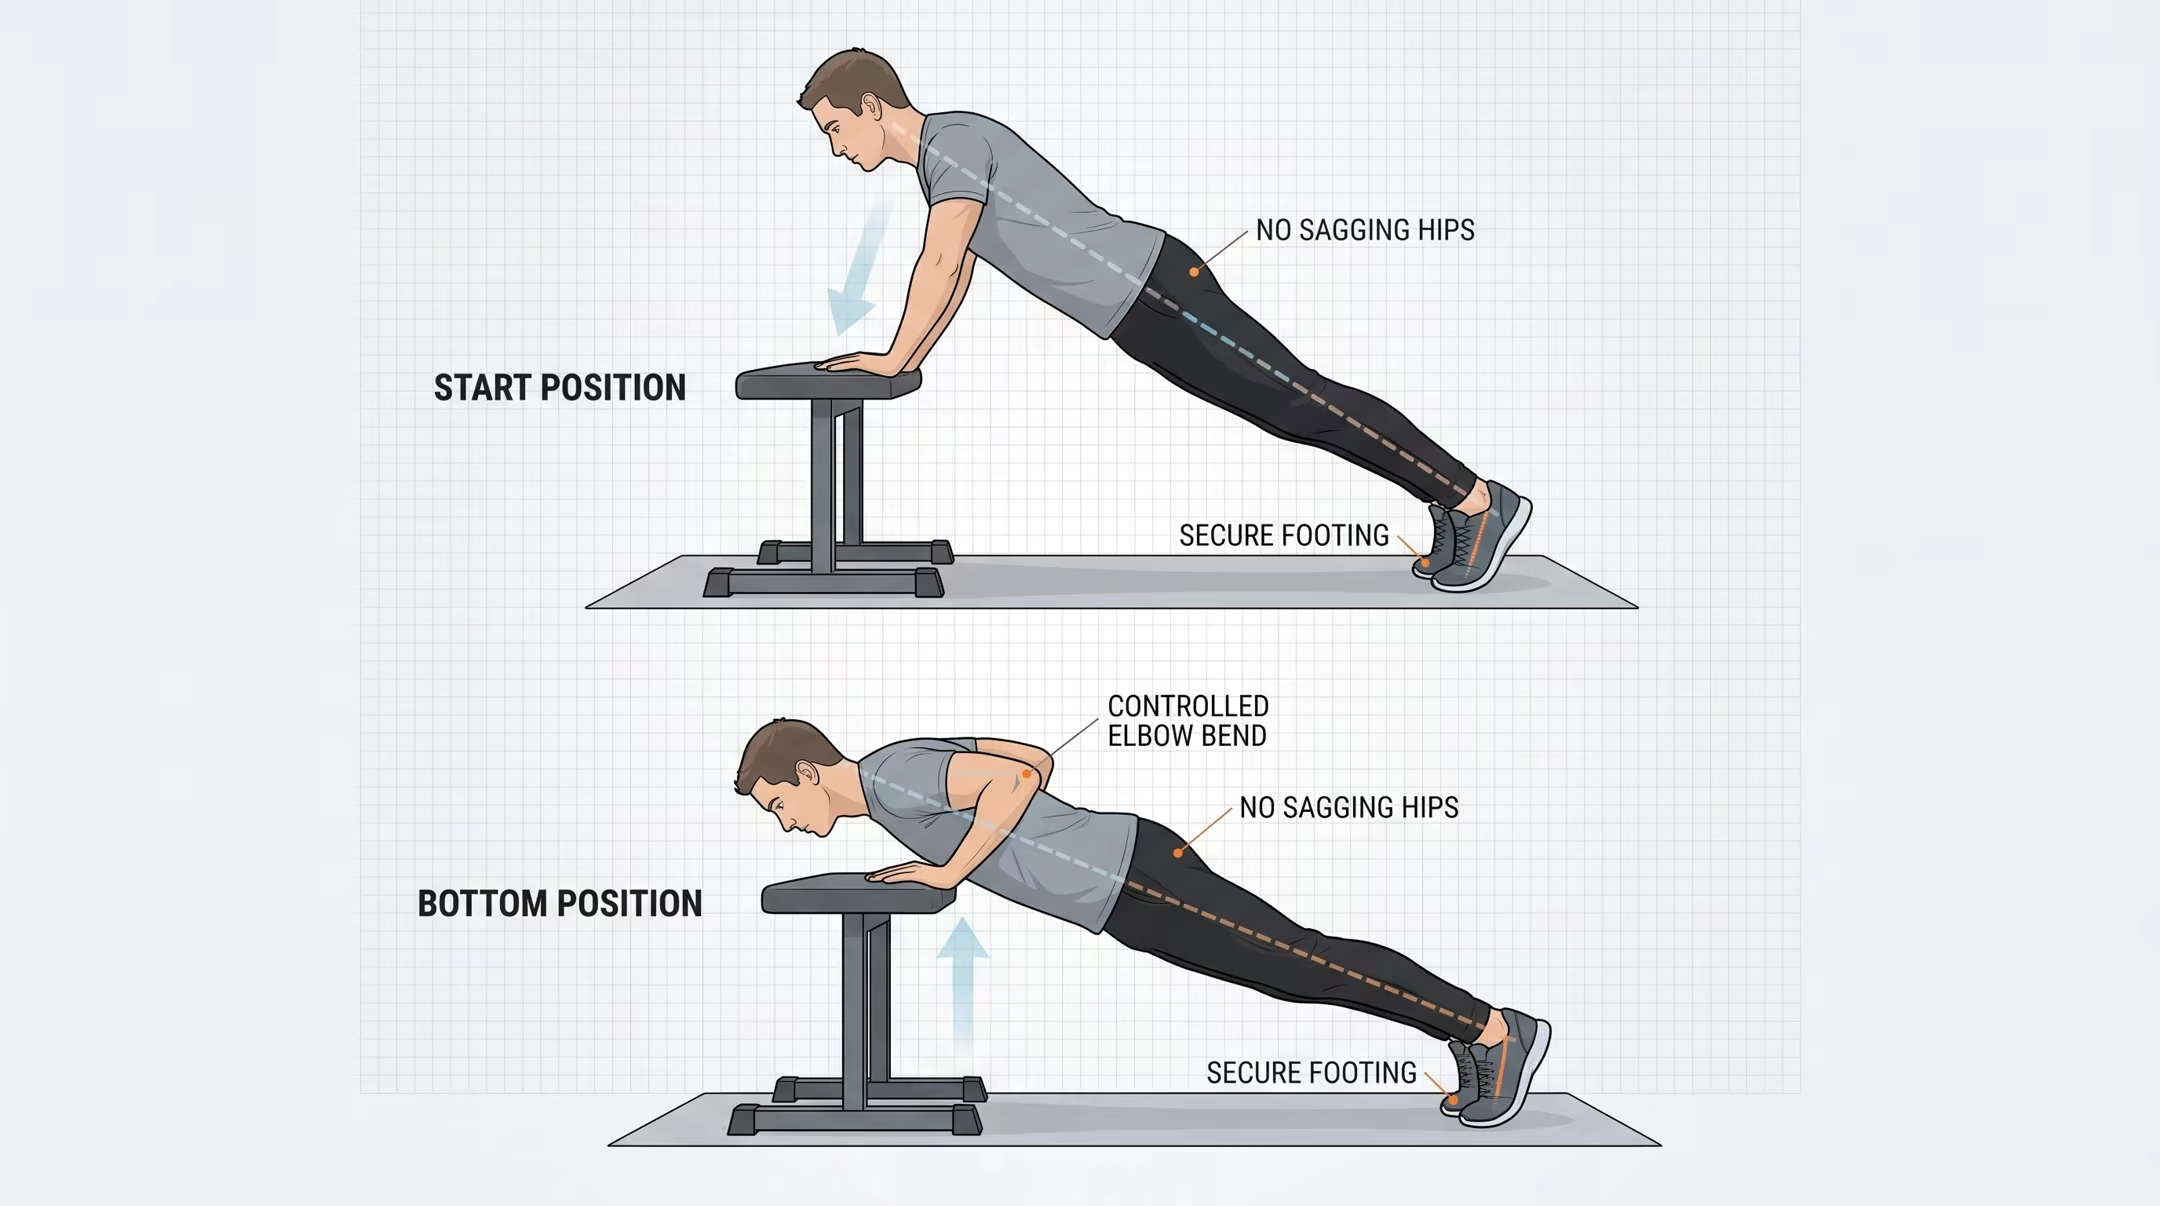
If floor push-ups turn into sagging hips or a collapsing descent, raise your hands. Incline push-ups let you practice the movement with less difficulty. Use a fixed, stable surface that can bear your weight, such as a suitable countertop or secured exercise bench. Avoid rolling chairs and furniture that slides or tips. Set your hands around shoulder width, with enough room to lower your chest between them. Step back into a comfortable straight body position. Keep your head in line with your torso rather than reaching your chin toward the surface.
Lower your chest toward the support at a pace you can control. Let your elbows bend at a comfortable angle instead of forcing them wide. Press away so your chest and hips rise together, and keep breathing. Use a pain-free range rather than chasing depth you cannot manage. A wall push-up or knee push-up can also be a starting option. Pick the version that allows consistent movement, not the one with the most impressive name. Stop the set before you have to twist, sag, or grind through the final repetition.
Record the support height and the repetitions you completed with the same technique. When that version feels reliably controlled across several sessions, try a slightly lower stable support. Treat this as a coaching example, not a fixed unlock rule. If the new version changes your technique substantially, return to the previous height.
Prepare for overhead support with feet on the floor
Before head-down practice, consider whether inversion is appropriate for you. If you have been advised to avoid it, have a relevant medical condition, or are unsure because of dizziness or other symptoms, ask your clinician first. You can continue suitable upright strength work without attempting a handstand. Begin preparation with gentle, pain-free wrist and shoulder movements. A warm-up does not make a painful position acceptable.
A feet-on-floor pike support is one option for exploring a more overhead arm position without lifting your feet. Start on hands and knees, then lift your hips into an inverted V with both feet on the floor. Bend your knees as needed. Choose a comfortable distance between hands and feet, keeping plenty of weight through your feet initially. Press the floor away with straight arms without forcing your elbows backward. Keep your head off the floor and breathe normally. Finish by lowering your knees under control. This is a support drill, not a dive, a pike push-up, or permission to launch your feet upward. If you cannot enter and leave it comfortably, ask a trainer for a simpler option.
Learn entries and exits before wall handstands
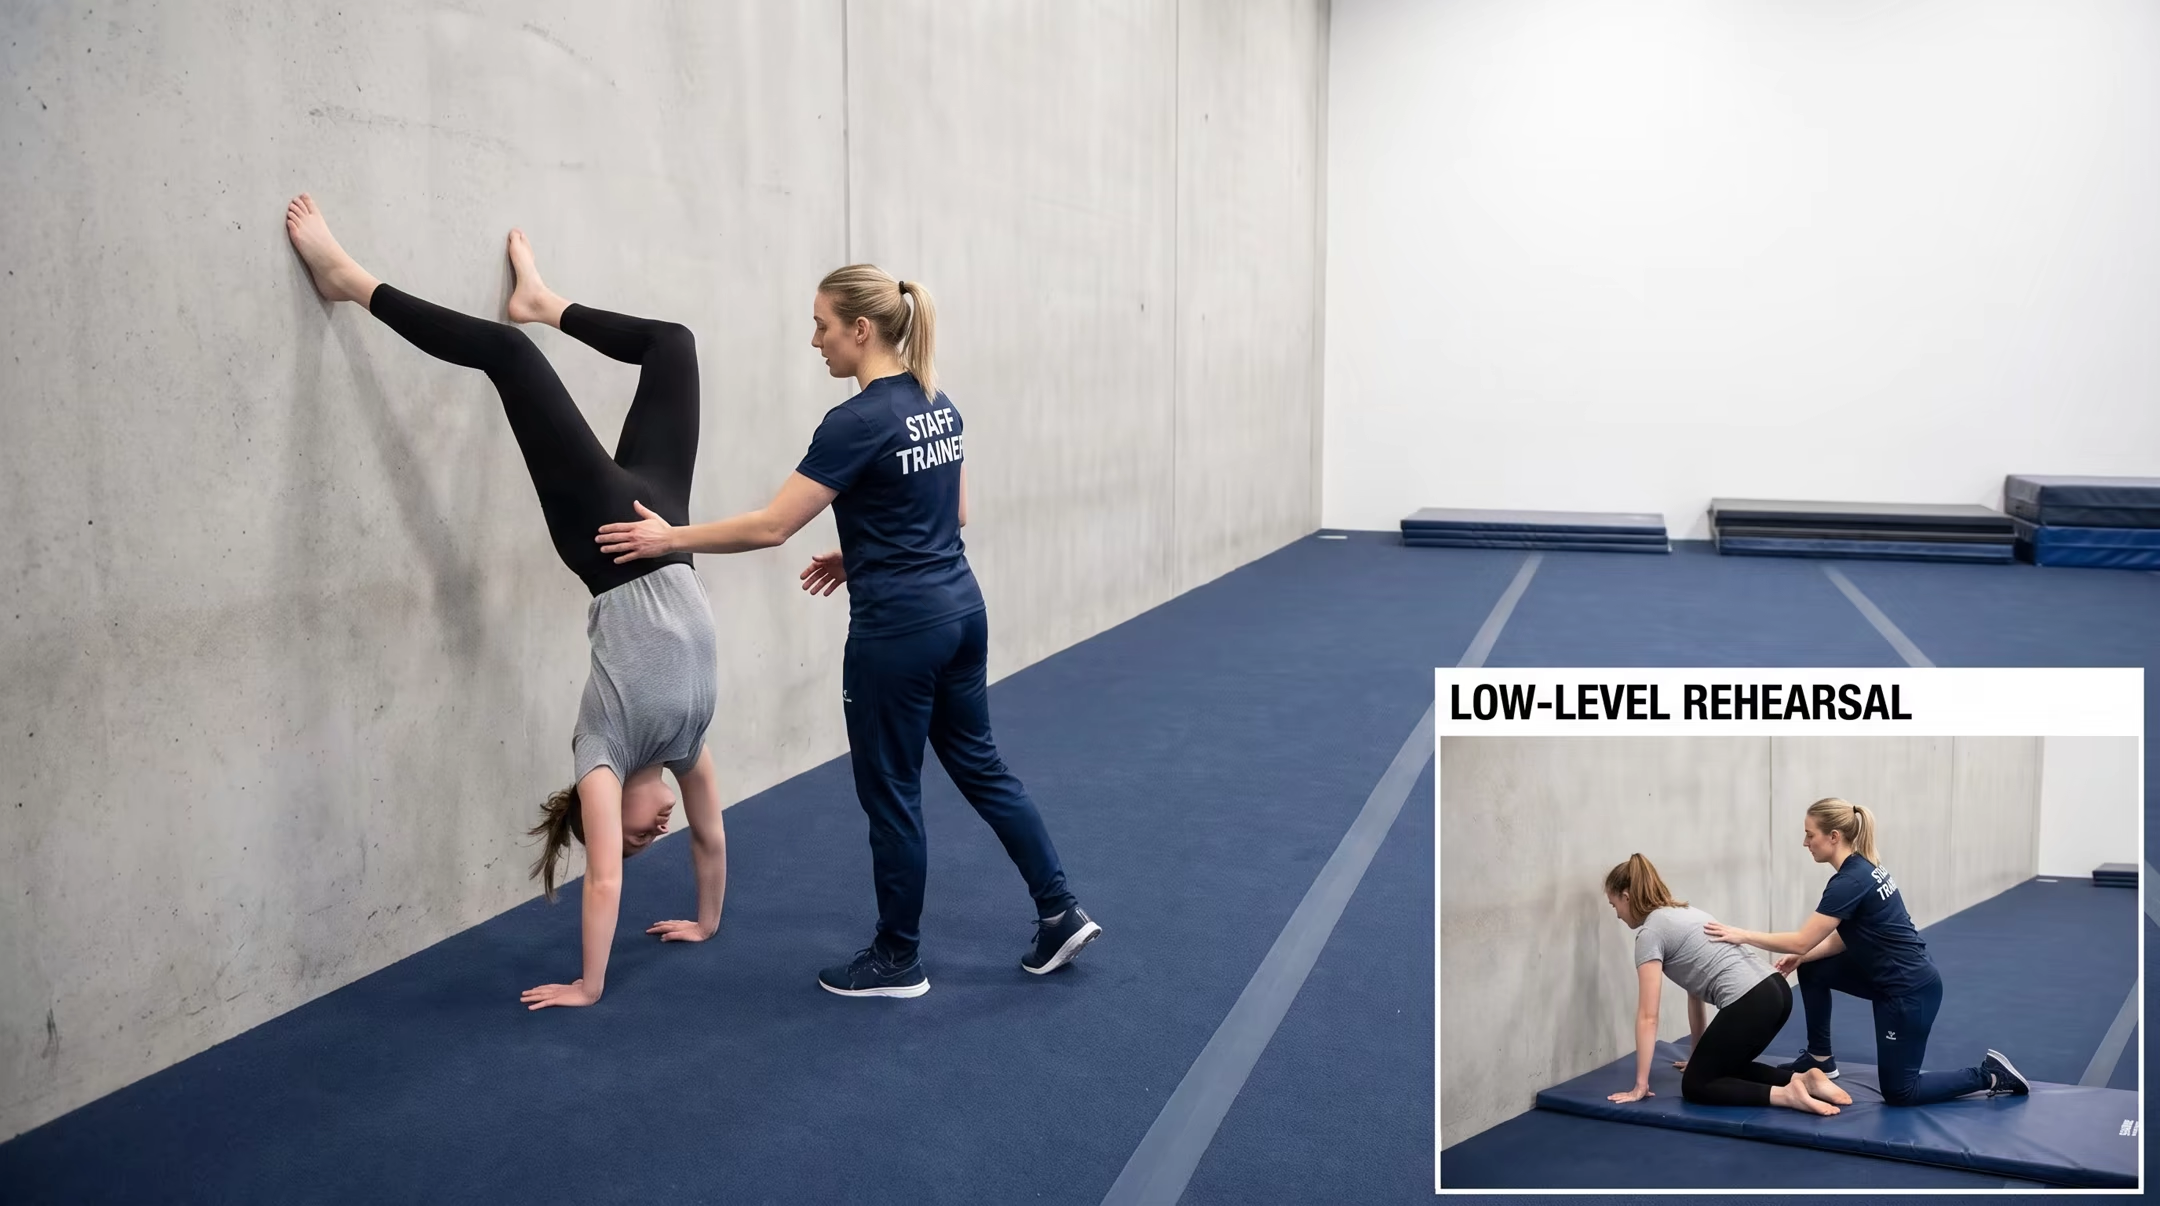
A wall gives you support, but it does not remove the possibility of falling. Before trying wall inversions, work with a qualified trainer who can teach and check your entry and exit in person, beginning at a low level. This article cannot teach a cartwheel exit safely, and a video demonstration is not a substitute for coached practice. Your trainer should check the space, surface, and support. Use a clear area with a stable, nonslip floor and an appropriate solid wall, away from furniture, glass, and other people. A friend who has never spotted a handstand is not a substitute for someone trained to help.
Once those basics are established, coached wall handstand practice can help you get accustomed to supported inversion and overhead loading. The trainer might choose a less vertical supported position rather than immediately taking you close to the wall. Follow the entry and return they have taught; do not improvise a wall walk from this description. End each attempt while you still have enough control to use your practiced exit. A longer hold is a poor trade if it leaves you stranded or too tired to come down deliberately.
Use readiness checks, not a universal rep count
There is no push-up number that proves you are ready for a freestanding handstand. A conservative coaching discussion might ask whether your chosen support is pain-free, your arms remain supportive, you breathe without panicking, and you can repeat the taught entry and exit reliably. These are examples to guide a trainer's assessment, not research-validated pass marks. Passing them still does not certify that unsupervised inversion is appropriate. Keep strength, overhead support, inversion comfort, and exit control as separate observations in your training notes.
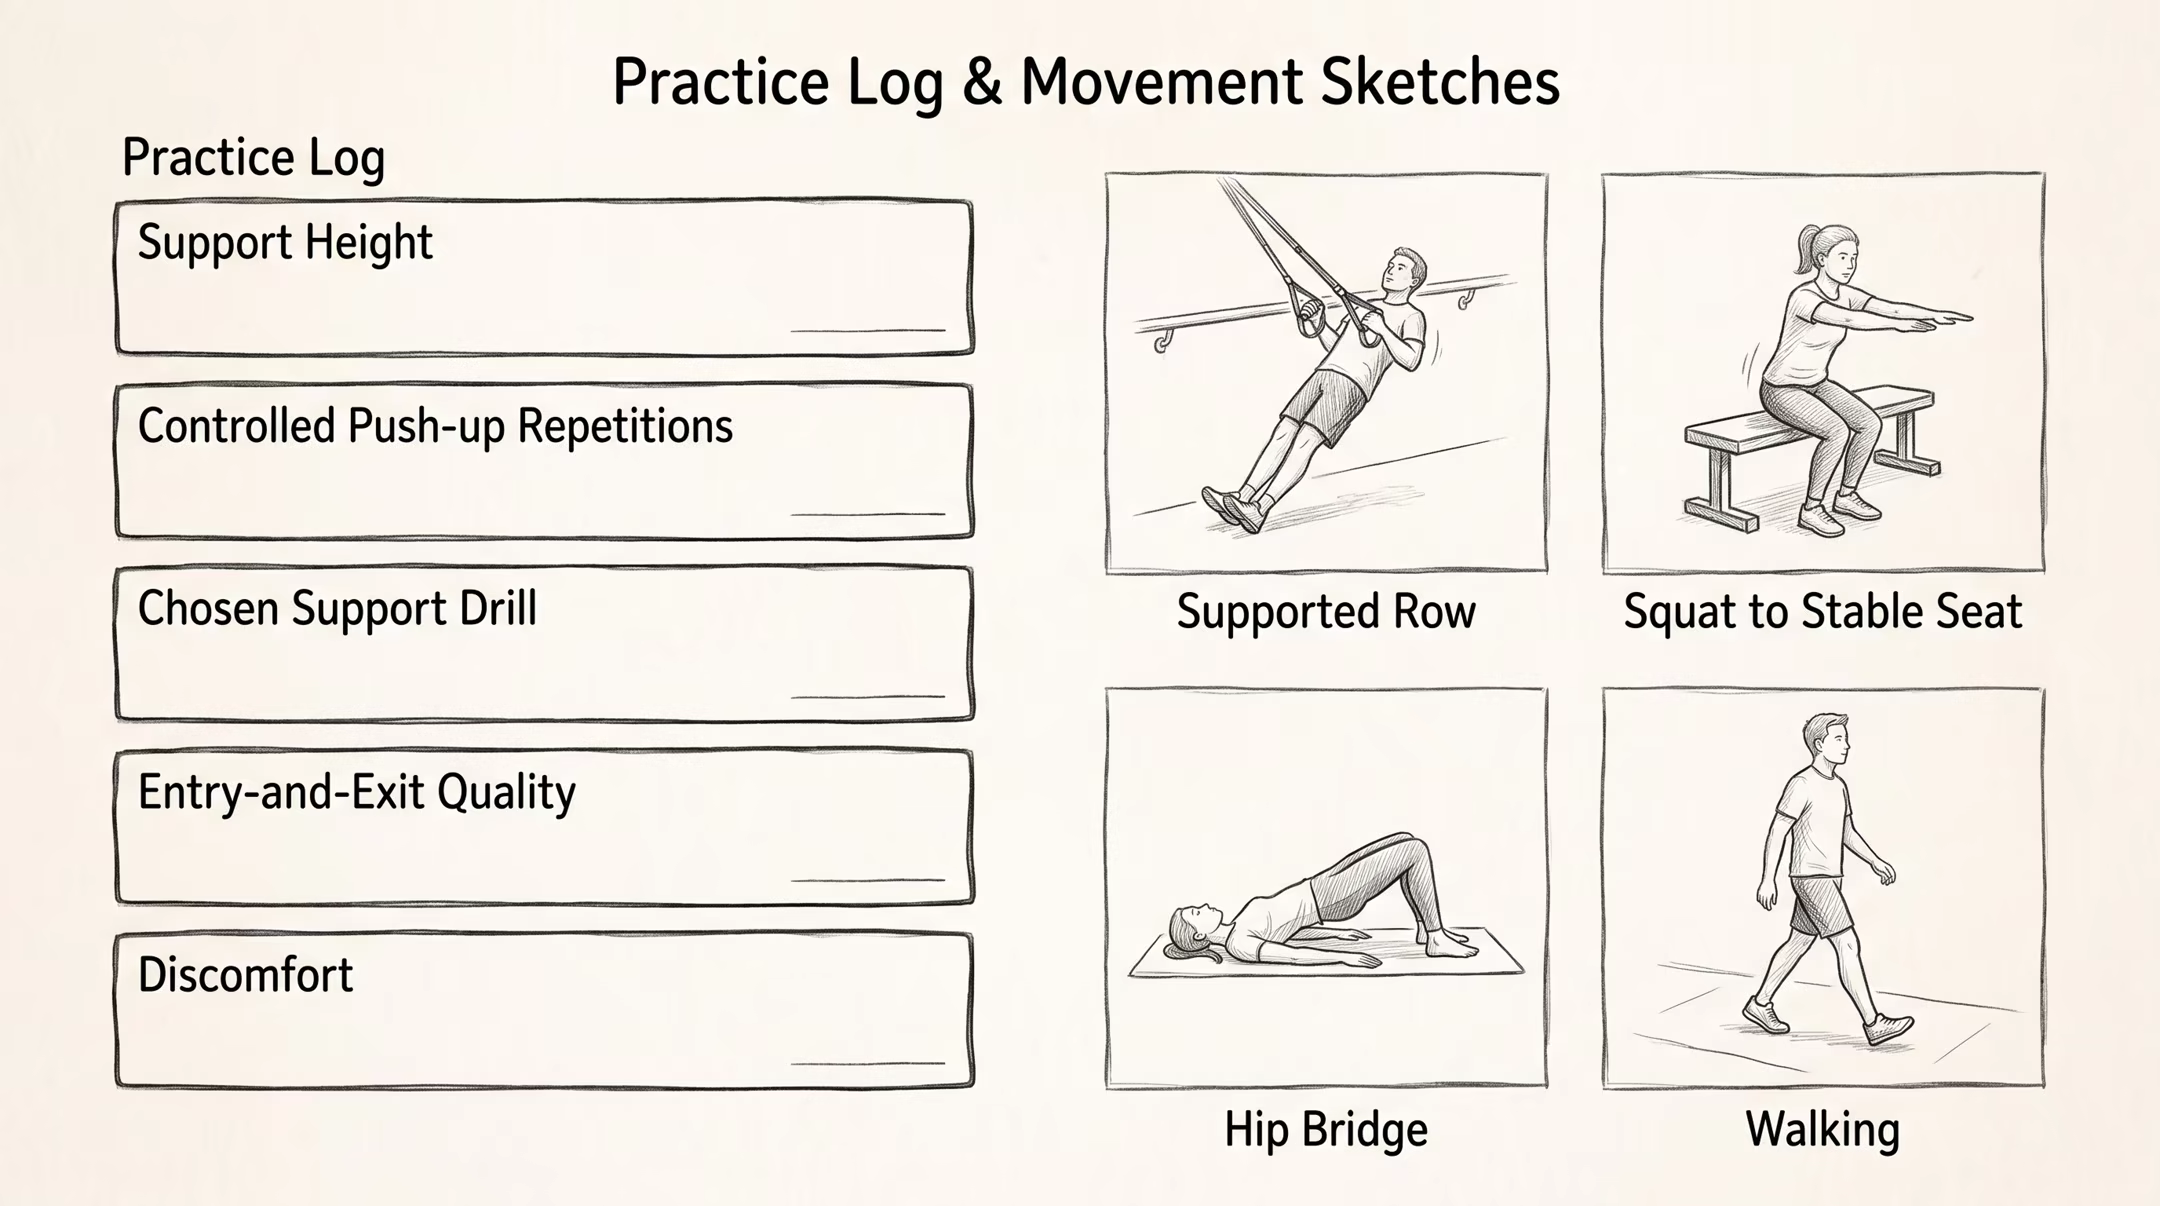
After practice, note the exercise version, what felt controlled, and where you needed help. For example, a comfortable pike support with an awkward return tells you to keep practicing the return, not to lift your feet. Compare equivalent attempts: changing the support height and adding time together makes it harder to know what improved. Include how you felt later that day and before the next session, so a longer hold does not hide poor recovery.
Balance needs its own practice
Supporting your weight and balancing it are different tasks. In a handstand, small pressure changes through the hands help manage your position. A trainer can introduce these adjustments with support available, after you have an established way out. Do not replace every wall drill with repeated freestanding kick-ups after one successful moment. Record whether an attempt began under control and ended with your practiced exit, not just how long your feet stayed up. A brief balance found by accident is different from a position you can reach and leave consistently.
A brief practice template that leaves room for strength
The following is an original editorial example, not a research-tested handstand prescription. Try two brief practice sessions on nonconsecutive days, before strength work while you are fresh. Adjust the amount with a trainer rather than treating the schedule as a requirement. Allow about three minutes for gentle wrist and shoulder preparation. Use up to seven more minutes for your current support drill. A beginner working with feet on the floor might try three pike holds of five to ten seconds, resting roughly a minute between them. Shorten or skip attempts if control deteriorates. For wall practice, use the drill and duration agreed with your trainer instead.
Then train the rest of your body. One small starting example is two sets of four to eight suitable push-ups, plus manageable pulling, squat, hip-hinge, and trunk exercises. A supported dumbbell row, squat to a stable seat, hip bridge, and dead bug are possible choices. They need their own technique instruction and appropriate scaling. Pulling often needs equipment; do not improvise an anchor from questionable furniture. Train the major muscle groups at least twice weekly if appropriate for you, and adapt the workload to recovery. The handstand goal should not crowd out your legs, back, or ordinary aerobic activity.
Troubleshoot the part that is limiting you
If your push-ups improve but overhead support still feels awkward, adding more push-ups may not address the problem. Ask a trainer to assess that position. If you arch your back heavily to reach overhead, use a less demanding drill rather than forcing a straight handstand shape. If fear takes over, return to the low-level entry-and-exit practice your trainer selected. If your entries become uncontrolled as you tire, finish the skill work. Compare a few sessions using the same drill before changing it, and change only one difficulty variable at a time.
Push-Up to Handstand Progression FAQs
Do I need a floor push-up before handstand preparation?
No universal floor push-up prerequisite applies. You can work on scaled pushing and suitable preparation in parallel. That does not make you ready for inversion; overhead support, medical suitability, and coached entry-and-exit control still need attention.
Are dips, headstands, or handstand push-ups required?
No. They are different exercises, not mandatory steps to a first handstand. A headstand also places support through the head, so do not use it as an improvised substitute for learning to support yourself on your hands.
How long does a beginner handstand progression take?
There is no dependable deadline. Starting ability, suitable practice, confidence, and recovery differ. Track repeatable support, better-controlled entries, and deliberate exits before using a freestanding hold as your only measure.
Should I practice handstands every day?
Daily practice is not a beginner requirement. Start with an amount you can recover from and review it with your trainer. Keep a workable push-up variation, one suitable support drill, and the next coached skill task in your plan; add difficulty when those choices remain controlled.
Want a clear plan for your next skill?
We built Calistack to show you the exact steps from where you are right now to your first handstand, muscle-up, or lever.